

")
A 3-way switch is a crucial component in electrical wiring, allowing control of a single light fixture from two different locations. This setup is commonly found in staircases, hallways, and large rooms where multiple switch locations enhance convenience. In this guide, we will focus on a specific wiring method Power at Light, which means the power source comes into the light fixture before reaching the switches.
Understanding how to wire a 3-way switch properly ensures safe and efficient installation. This guide provides a detailed explanation along with an easy-to-understand diagram for clarity.
How Does a 3-Way Switch Work?
A 3 way switch does not have an ON/OFF position like a single-pole switch. Instead, it operates by redirecting electrical current between two traveler wires, depending on the switch position. This allows the light to be controlled from multiple locations.
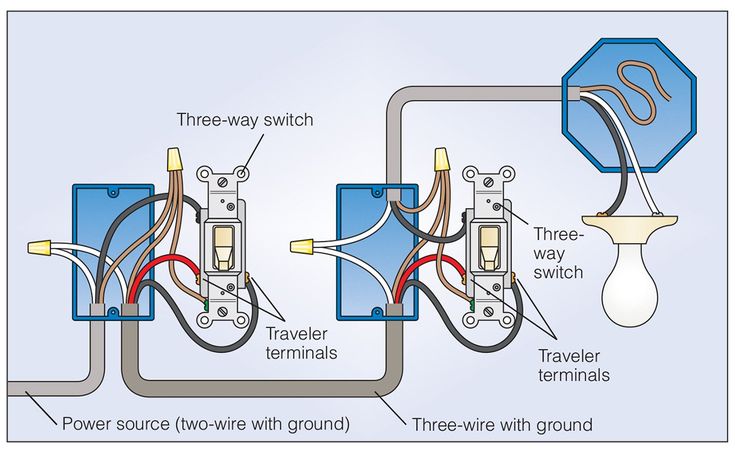
A 3 way switch consists of:
- Common terminal (black screw) – Connects to the load (light) or power source.
- Traveler terminals (brass screws) – Two terminals that alternate current flow between switches.
- Ground terminal (green screw) – Connects to the grounding wire.
Understanding Power at Light Wiring
In this configuration, the power source enters the light fixture and then continues to the two 3-way switches. This is slightly different from the common power-at-switch method, but it is still a reliable and effective way to wire a 3-way switch system.
Components Required
- Two 3-way switches
- One light fixture
- 14/2 NM cable (for standard wiring)
- 14/3 NM cable (to connect the switches)
- Electrical tape and wire nuts
- Screwdrivers and wire strippers
Step by Step Wiring Guide
Step 1: Turn Off Power
Before beginning, turn off the circuit breaker controlling the circuit to avoid any electrical hazards.
Step 2: Identify the Wires
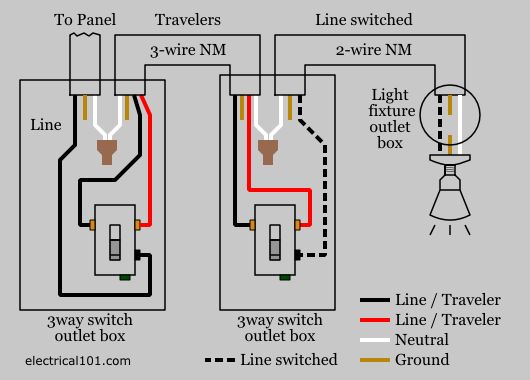
- 14/2 wire (from the breaker panel to the light fixture) includes a black (hot), white (neutral), and bare ground wire.
- 14/3 wire (between switches and light) includes a black, red, white, and ground wire.
Step 3: Wiring the Light Fixture
- Connect the incoming power’s black (hot) wire to the light fixture’s black wire using a wire nut.
- Connect the neutral (white) wire from the power source to the light fixture’s white wire.
- Connect the ground wire to the light fixture’s ground terminal.
Step 4: Wiring the First 3-Way Switch
- Run a 14/3 cable from the light fixture to the first switch location.
- Connect the black wire from the 14/3 cable to the common terminal (black screw) of the first switch.
- Connect the red and white wires to the traveler terminals (brass screws).
- Connect the ground wire to the switch’s ground terminal.
Step 5: Wiring the Second 3-Way Switch
- Run another 14/3 cable from the first switch to the second switch location.
- Connect the black wire from the second switch to the common terminal.
- Attach the white and red cables to the traveler connectors.
- Connect the ground wire to the switch’s ground terminal.
Step 6: Final Connections at the Light Fixture
- Tie the black wire from the switch to the black wire of the light fixture (this sends power to the light when switched on).
- The neutral white wire from the fixture should already be connected to the power source’s neutral wire.
- All ground wires should be connected properly.
Step 7: Testing the Circuit
- Turn the breaker back on.
- Test both switches to ensure the light can be controlled from both locations.
- If the light does not operate correctly, check all connections and ensure the traveler wires are correctly placed.
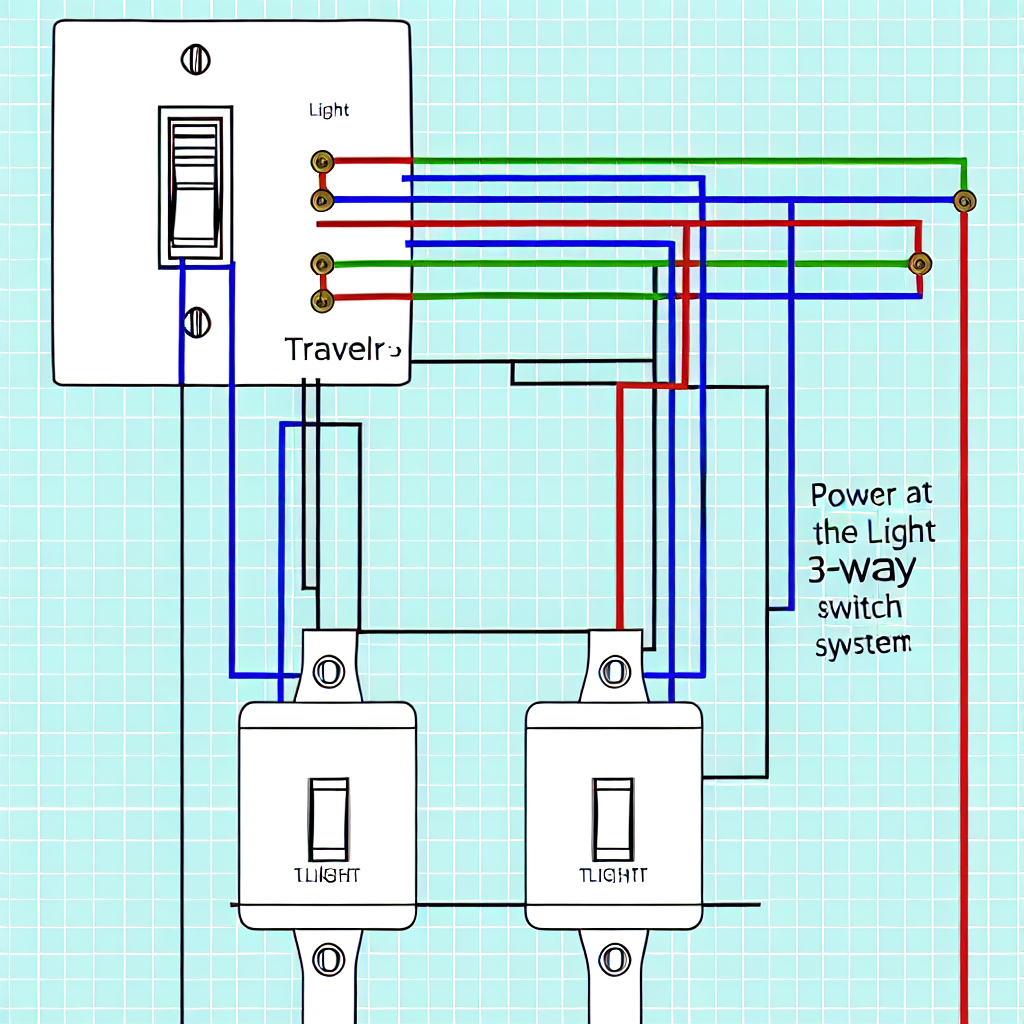
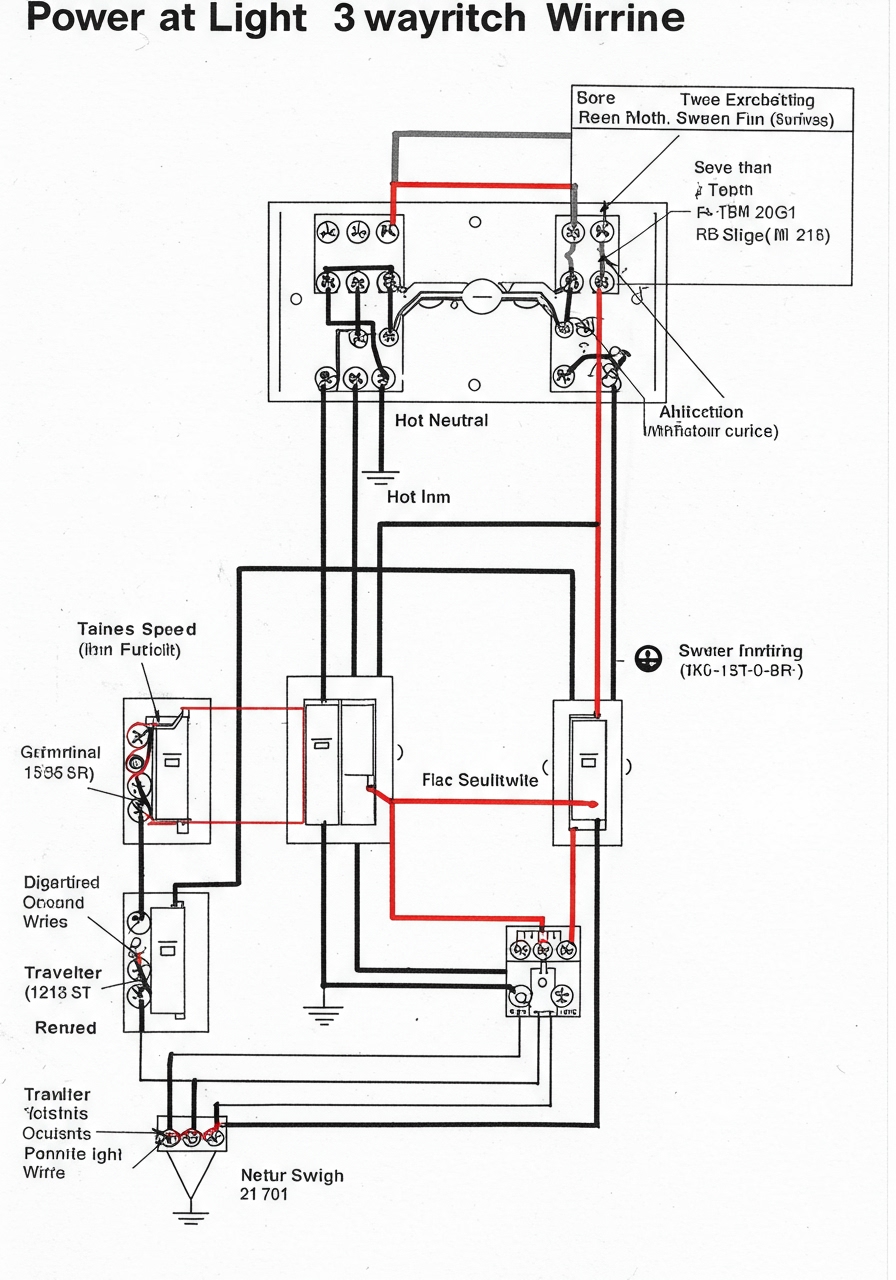
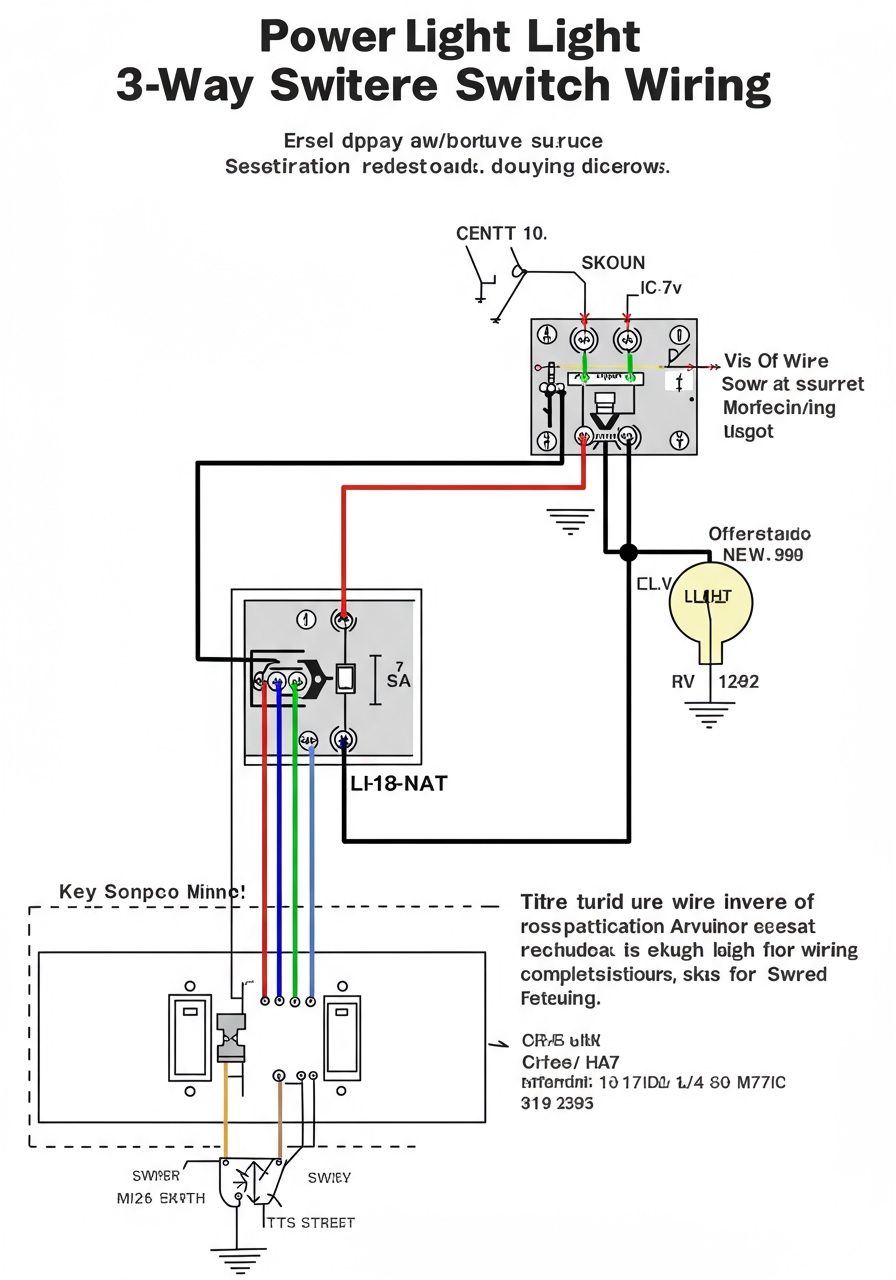
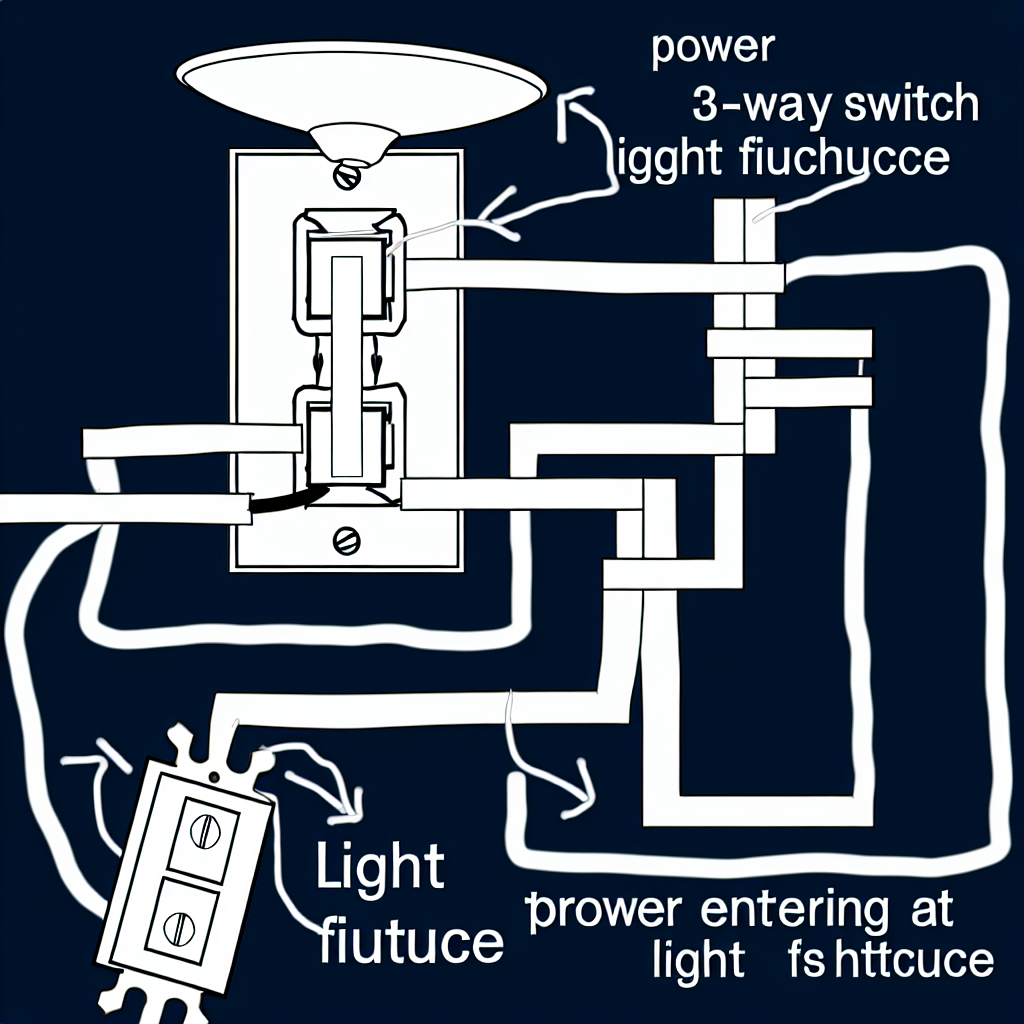
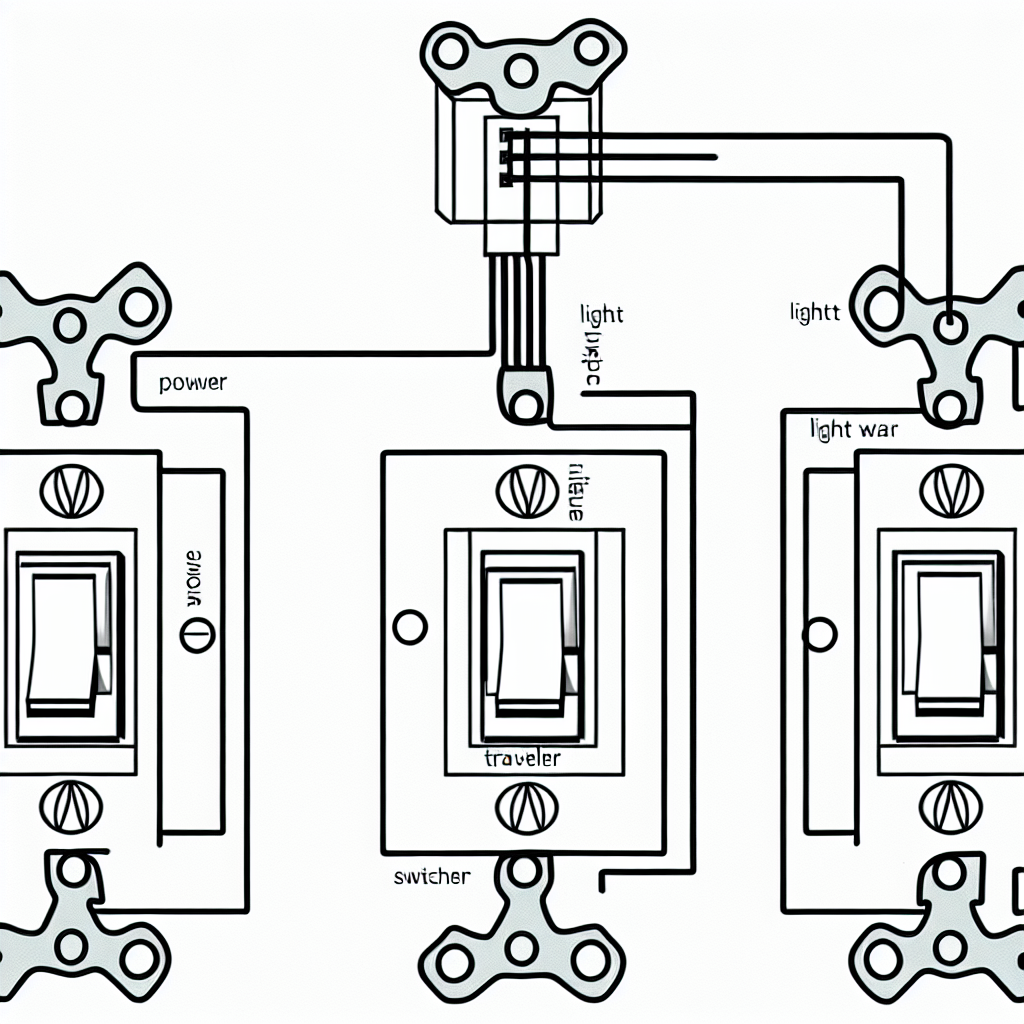
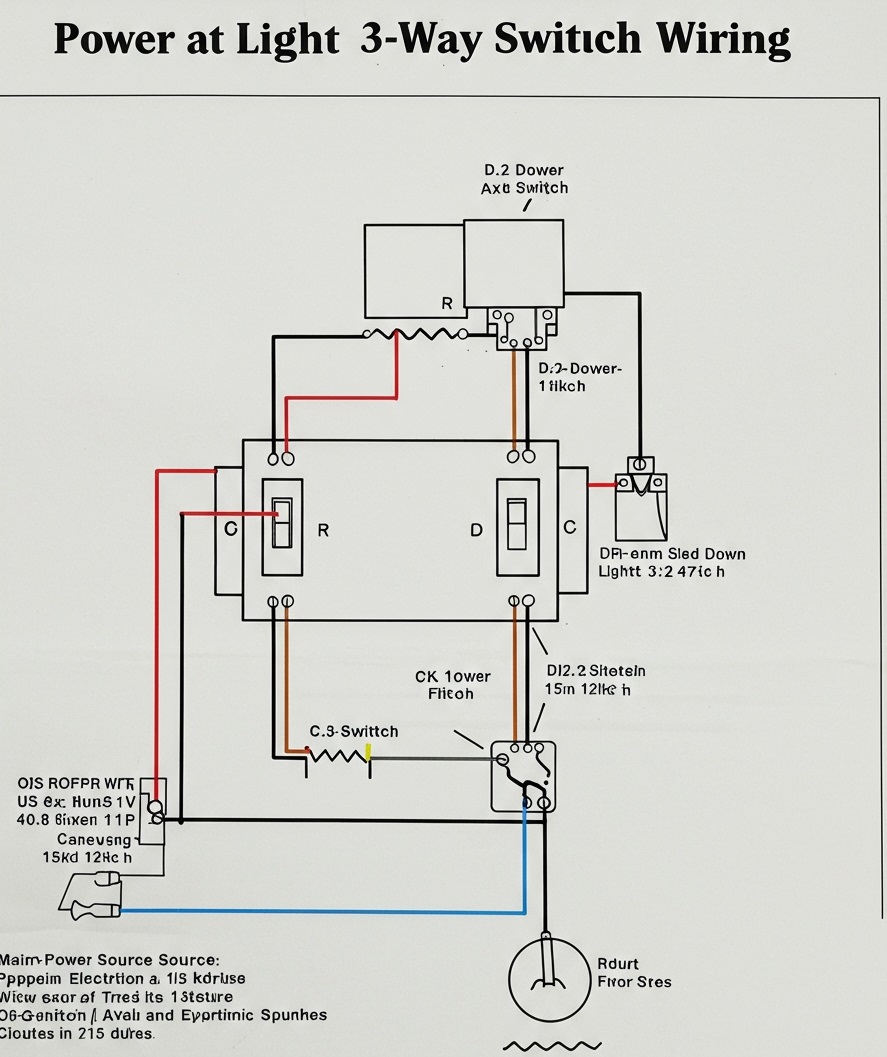
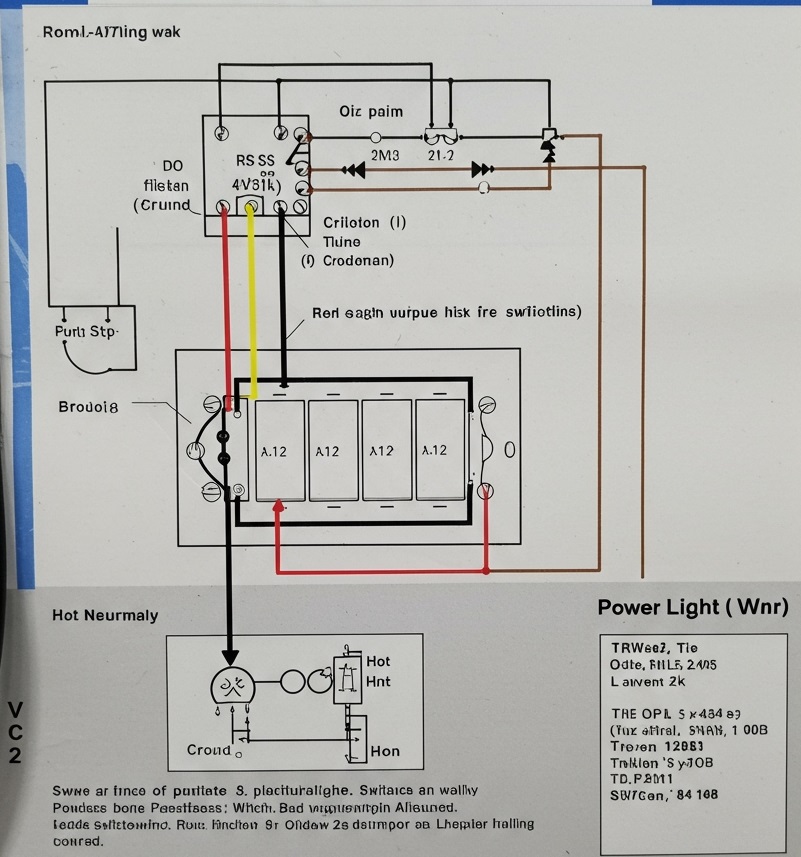
Diagram for Power at Light 3-Way Switch Wiring.
Here are some Diagrams:
Troubleshooting Common Issues.
- The light stays on or off permanently: Check the common wire connections.
- Switches don’t work properly: Ensure the traveler wires are connected correctly.
- Flickering light: Check for loose wire connections or damaged wires.
- Breaker trips: Ensure no wires are touching or shorted.
Safety Tips Must Keep in Mind.
- Before doing any work, always switch off the electricity at the breaker.
- To make sure the wires are not live, use a voltage tester.
- Ensure all connections are secure with wire nuts.
- Use properly rated cables (e.g., 14-gauge for 15A circuits, 12-gauge for 20A circuits).
- If unsure, consult a licensed electrician.
Final Things
Wiring a 3-way switch with power at the light may seem complex at first, but by carefully following each step and ensuring correct connections, it becomes manageable. This setup allows convenient lighting control from two locations, improving both functionality and efficiency in your home.
By understanding how the traveler, common, and ground wires interact, you can confidently install or troubleshoot a 3-way switch system. Always prioritize safety, and double-check all connections before restoring power.
If you found this guide helpful, consider sharing it with others who may need assistance with their home electrical projects!
Frequently Asked Questions (FAQs).
1. What is a 3-way switch?
One kind of light switch that lets you operate a single light from two distinct places is a 3-way switch. Large rooms, stairwells, and halls frequently employ it.
2. What wires are needed for a 3-way switch?
You typically need:
- 14/2 NM cable (for a power source to light fixture)
- 14/3 NM cable (for connections between the two switches)
- Ground wire (for safety)
3. Can I install a 3-way switch without a ground wire?
A ground wire is essential for safety and is required by modern electrical codes. However, older installations may not have one. In such cases, consult a licensed electrician for proper grounding solutions.
4. What happens if I mix up the traveler wires?
If the traveler wires are not connected correctly, the switches may not function properly, or the light may behave unpredictably. Always ensure traveler wires are connected to the brass terminals.
5. Why is my 3-way switch not working?
Common reasons include:
- Incorrect wiring (wrong traveler/common connections)
- Loose wire connections
- A faulty switch
- A tripped breaker or damaged circuit
6. How do I know which wire is the common wire?
The common wire is typically connected to a black screw on the 3-way switch. Use a voltage tester to confirm the live wire.
7. Can I convert a single-pole switch into a 3-way switch?
Yes but you need additional wiring and a second switch. This requires running a 14/3 cable between the switches.
8. Is there a smart 3-way switch option?
Many smart switches can replace traditional 3-way switches, allowing remote control via Wi-Fi or Bluetooth. These are ideal for home automation.
9. How do I test a 3-way switch system?
After wiring, turn the circuit breaker back on and test both switches by toggling them in different positions. If the light does not behave as expected, double-check your wiring.
10. Should I hire an electrician to install a 3-way switch?
If you are unfamiliar with electrical work or local electrical codes, it is recommended to hire a licensed electrician for safe and proper installation.
